Prep: 15 min | Brine / Marinate: 4 hrs (optional) | Cook: 1 hr 15 min – 1 hr 45 min | Servings: 4–6 | Approx. Calories: 390 / serving
Traeger Chicken Recipe : There is something almost ceremonial about firing up a Traeger pellet grill. The moment that first curl of apple-wood or hickory smoke rises into the air, you know the meal ahead is going to be something special. And when chicken is on the grate — whole birds, spatchcocked halves, thighs, or drumsticks — the Traeger transforms it into something that a conventional oven simply cannot replicate: a deep mahogany crust, a faint kiss of wood smoke, and meat that stays astonishingly juicy all the way down to the bone.
This guide is the only Traeger chicken recipe you will ever need. Whether you are a pellet-grill newcomer or a seasoned pitmaster looking to refine your technique, you will find everything here: a detailed ingredient table, step-by-step smoking instructions, internal temperature targets, wood-pellet pairing tips, make-ahead strategies, and answers to the most common questions.
Why the Traeger Is the Best Way to Cook Chicken
Pellet grills like the Traeger Ironwood, Pro Series, or Timberline use compressed wood pellets as both fuel and flavoring, maintaining a consistent temperature with remarkable precision. Unlike charcoal or gas, you set a temperature, close the lid, and the grill manages airflow and pellet feed automatically. For chicken — a protein that dries out quickly when overcooked or remains dangerously underdone when heat is uneven — this temperature consistency is a genuine game-changer.
Key advantages of Traeger-smoked chicken:
- Even heat eliminates hot spots, so breasts and thighs cook at the same rate
- Low-and-slow smoke phase builds complex flavour before the final sear
- Wood-smoke creates a rosy smoke ring and gorgeous colour unmatched by any oven
- Hands-off cooking frees you to prep sides, set the table, or simply relax
- Drip tray catches juices — no flare-ups, no charred skin from fat fires
Tableau des Ingredients / Full Ingredient Table
The recipe below is designed for one whole chicken (around 1.6–1.8 kg / 3.5–4 lb), spatchcocked for faster, more even cooking. All quantities can be scaled proportionally. The table is split into three groups: the chicken itself, the dry rub, and the compound butter baste.
Part 1 — The Chicken
| INGREDIENT | QUANTITY | UNIT | NOTE |
| Whole chicken, backbone removed | 1 | bird | ~1.6–1.8 kg / 3.5–4 lb, spatchcocked |
| Kosher salt (dry brine) | 1.5 | tbsp | Rub all over, rest 4 hrs or overnight |
| Olive oil | 2 | tbsp | Pat chicken dry first, then oil it |
Part 2 — Smoky Dry Rub
| INGREDIENT | QUANTITY | UNIT | NOTE |
| Smoked paprika | 2 | tsp | Adds colour and smoky depth |
| Garlic powder | 1.5 | tsp | Use powder, not granules |
| Onion powder | 1 | tsp | Balances the garlic |
| Brown sugar | 1 | tsp | Promotes caramelised crust |
| Dried thyme | 1 | tsp | Classic poultry herb |
| Dried oregano | 0.5 | tsp | Optional but recommended |
| Black pepper, freshly ground | 1 | tsp | Cracked, not pre-ground |
| Cayenne pepper | 0.25 | tsp | Adjust to heat preference |
| Kosher salt | 1 | tsp | In addition to dry brine above |
Part 3 — Herb Compound Butter Baste
| INGREDIENT | QUANTITY | UNIT | NOTE |
| Unsalted butter | 4 | tbsp | Softened to room temperature |
| Fresh garlic, minced | 3 | cloves | Or 1 tsp garlic powder |
| Fresh rosemary, chopped | 1 | tbsp | Stems removed |
| Fresh thyme leaves | 1 | tbsp | Or 1 tsp dried |
| Lemon zest | 1 | tsp | Adds brightness |
| Lemon juice | 1 | tbsp | Freshly squeezed |
| Dijon mustard | 1 | tsp | Helps butter adhere to skin |
| Fine sea salt | 0.25 | tsp | Season the butter itself |
PRO TIP: Mix the compound butter the night before and roll it into a log in cling wrap. Refrigerate until 30 minutes before cooking. It will be easy to slice and melt perfectly on the hot chicken.
Choosing the Right Wood Pellets for Chicken
Chicken is a mild protein that absorbs smoke quickly, so pellet choice matters more than many cooks realise. Strong hardwoods like mesquite can overwhelm the delicate flavour if used exclusively. Here is a quick reference:
| WOOD PELLET | SMOKE INTENSITY | FLAVOUR PROFILE & BEST USE |
| Apple | Mild | Sweet, fruity — best for whole birds; crowd-pleasing |
| Cherry | Mild–Medium | Rich ruby colour, slightly sweet; great with the dry rub |
| Pecan | Medium | Nutty, mellow — excellent for spatchcock chicken |
| Hickory | Strong | Classic BBQ smoke; use in a 50/50 blend with apple |
| Alder | Very Mild | Subtle, clean — lets the rub flavours take centre stage |
| Traeger Signature Blend | Medium | Mix of hickory, maple, cherry — versatile and reliable |
Step-by-Step Traeger Chicken Instructions
Step 1 — Dry Brine the Chicken (4 Hours to Overnight)
Spatchcock (butterfly) the chicken by placing it breast-side down on a cutting board. Use sharp kitchen scissors to cut firmly along both sides of the backbone and remove it entirely. Flip the bird over and press down firmly on the breastbone until you hear a crack — the chicken should now lay flat. This single step cuts your cook time by 25–30 % and ensures the breasts and thighs reach safe temperature at the same time.
Pat the entire chicken completely dry with paper towels — including the cavity. Rub 1.5 tablespoons of kosher salt all over the skin and under it wherever possible. Place uncovered on a wire rack set over a baking sheet and refrigerate for at least 4 hours, or ideally overnight. The dry brine draws moisture to the surface, which then gets re-absorbed, seasoning the meat deeply and drying the skin for maximum crispness on the Traeger.
Step 2 — Make the Rub & Compound Butter
In a small bowl, combine all dry rub ingredients and stir until evenly mixed. In a separate bowl (or on a board), mash the softened butter with the garlic, rosemary, thyme, lemon zest, lemon juice, Dijon, and salt until fully incorporated. You can do this up to 24 hours ahead — just cover and refrigerate both.
Step 3 — Season the Chicken
Remove the chicken from the fridge 30–45 minutes before cooking to take the chill off — cold meat placed directly on the grill prolongs the smoke phase unevenly. Drizzle 2 tablespoons of olive oil over the whole chicken and rub it in with your hands. Apply the dry rub generously on all surfaces, including the underside. Using your fingers, gently loosen the skin over the breasts and thighs and work some of the compound butter directly onto the meat under the skin. Reserve half the butter for basting.
Step 4 — Set Up the Traeger
Fill the hopper with your chosen pellets (apple or cherry are our top picks for chicken). Turn the Traeger on and preheat with the lid closed to 225°F (107°C) — this is your initial low-and-slow smoke phase. Allow 15 minutes for the grill to fully stabilise at temperature. Place a disposable drip tray or aluminium foil under the grate to catch juices and simplify clean-up.
Step 5 — Smoke Low & Slow (225°F / 107°C)
Place the spatchcocked chicken skin-side up directly on the grill grates. Close the lid and smoke at 225°F for approximately 45–60 minutes. During this phase, the smoke penetrates the meat, forming that coveted pink smoke ring just below the surface. Resist the temptation to open the lid frequently — every peek adds 10–15 minutes to your total cook time.
After 45 minutes, apply the first generous baste of compound butter using a silicone basting brush. The butter will sizzle and immediately begin forming a gorgeous lacquered crust.
Step 6 — Crank the Heat (375°F / 190°C)
After the smoke phase, increase the Traeger temperature to 375°F (190°C). This high-heat finish renders the fat under the skin, crisps it up beautifully, and drives the internal temperature to the finish line. Continue cooking for another 25–35 minutes, basting with compound butter once more halfway through.
Step 7 — Check Internal Temperature
This is the single most important step. Never rely on colour or time alone — always use an instant-read thermometer. Insert it into the thickest part of the thigh, away from bone.
| PART OF CHICKEN | TARGET TEMP (°F) | TARGET TEMP (°C) | STATUS |
| Breast (thickest part) | 160–165°F | 71–74°C | Safe & juicy |
| Thigh (near bone) | 165–170°F | 74–77°C | Safe & tender |
| Drumstick | 175°F+ | 79°C+ | Best texture |
| Whole bird average | 165°F | 74°C | FDA minimum |
Step 8 — Rest, Carve & Serve
Once the thigh reaches 165–170°F, remove the chicken from the Traeger and transfer it to a clean cutting board. Tent loosely with aluminium foil and let it rest for 10 full minutes. This resting period is non-negotiable — it allows the juices, which rush toward the surface during cooking, to redistribute throughout the meat. Skip the rest and those juices end up on your cutting board instead of in every bite.
After resting, carve the chicken: separate the legs, slice between the thigh and drumstick, and cut the breasts away from the keel bone. Arrange on a platter, drizzle any resting juices over the top, and finish with a squeeze of fresh lemon and a scattering of fresh herbs.
Pro Tips for Perfect Traeger Chicken Every Time
- Dry the skin thoroughly — moisture is the enemy of crispy skin. Pat dry before oiling and seasoning, and let the dry brine work uncovered in the fridge.
- Spatchcock always — a flat chicken cooks 25–30 % faster and browns more evenly than a whole trussed bird.
- Go under the skin with butter — rubbing seasoning or butter directly onto the meat (under the skin) seasons from the inside out and bastes the breast meat as it cooks.
- Use Super Smoke mode if your Traeger has it — the extra smoke intensity during the low phase deepens flavour significantly.
- Keep a probe thermometer in the thigh throughout — it removes all guesswork and lets you know exactly when to crank the heat and when to pull the bird.
- Save the drippings — the drip tray will be full of deeply flavoured pan juices. Skim the fat and use them as a quick au jus, pour over roasted vegetables, or whisk into a simple pan sauce.
Traeger Chicken Variations to Try Next
Traeger Smoked Chicken Thighs
Bone-in, skin-on thighs are forgiving, flavourful, and ideal for beginners. Smoke at 225°F for 45 minutes, then crank to 425°F until the skin crisps and the internal temperature hits 175°F. Total cook time: about 1 hour.
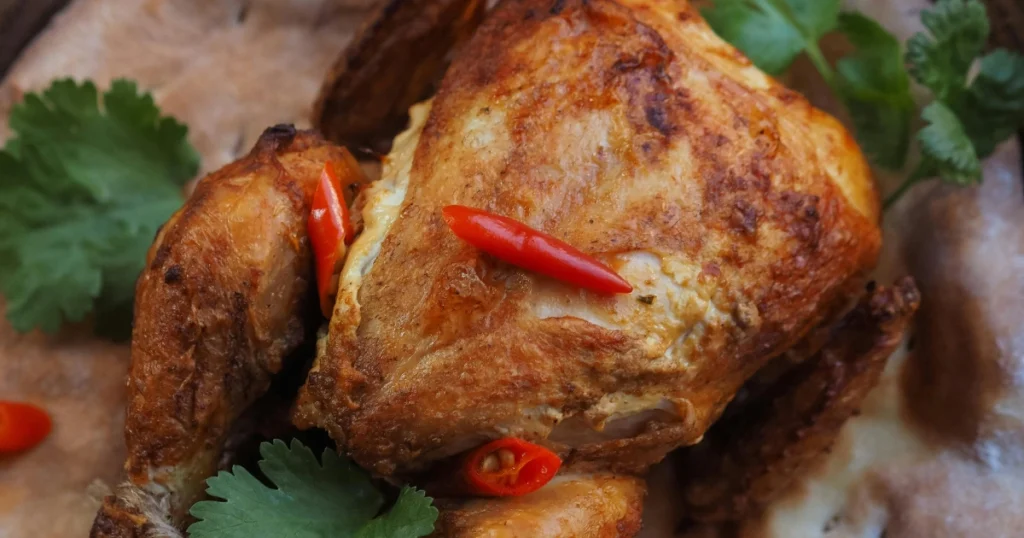
Traeger Beer Can Chicken
Prop a whole chicken upright over a half-full can of beer (or use a vertical roasting rack). Cook at 325°F for 1.5–2 hours. The steam from the beer keeps the inside incredibly moist while the Traeger smokes the outside to perfection.
Traeger Buffalo Chicken
Smoke chicken wings at 180°F for 30 minutes, increase to 375°F for 25 minutes, then toss in a classic Buffalo sauce (hot sauce + melted butter). Finish at 450°F for 5 minutes for maximum lacquer. Outrageously good.
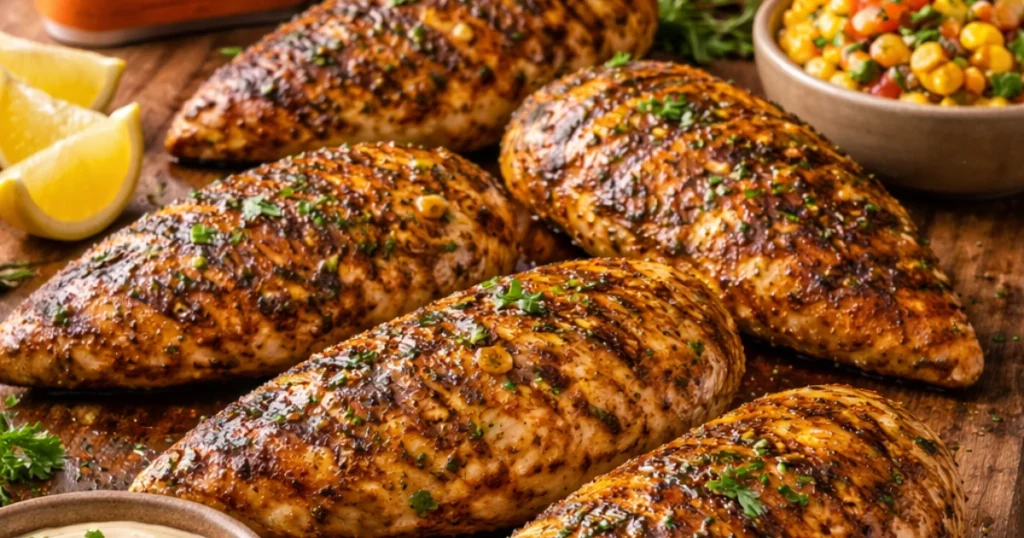
What to Serve with Traeger Smoked Chicken
A showstopper main deserves equally impressive sides. Here are our favourite pairings:
- Traeger smoked corn on the cob with chilli butter — it cooks right alongside the chicken
- Classic coleslaw — creamy and cool against the smoky heat
- Garlic mashed potatoes — to soak up every last drop of au jus
- Grilled broccolini with lemon and Parmesan — light and vibrant
- Smoked mac and cheese — if you want to keep everything on the Traeger
- Warm sourdough bread — because someone has to mop the plate
Storage, Reheating & Meal Prep
Refrigerator:
Store carved chicken in an airtight container for up to 4 days. Keep the drippings in a separate container — they make an incredible base for soups, risotto, or grain bowls.
Freezer:
Freeze portions in zip-lock bags with a splash of drippings to retain moisture. Lasts up to 3 months. Thaw overnight in the fridge before reheating.
Reheating:
For best results, reheat in a 325°F oven, loosely covered with foil, for 15–20 minutes. Add a splash of chicken broth to the pan to prevent drying. Microwave works in a pinch — cover and use 60% power in 90-second intervals.
Frequently Asked Questions
How long does it take to cook chicken on a Traeger?
A spatchcocked whole chicken takes about 1 hour 15 minutes to 1 hour 45 minutes total using the two-phase method (225°F for 45–60 minutes, then 375°F for 25–35 minutes). Bone-in thighs take about 1 hour. Wings take 55–65 minutes.
What temperature should I set my Traeger for chicken?
For the best of both worlds — smoke flavour and crispy skin — use a two-stage approach: start at 225°F for the smoke phase, then increase to 375°F for the finishing phase. If you are short on time, cooking at a steady 325°F throughout also delivers excellent results.
Do I need to flip chicken on the Traeger?
No. One of the great advantages of the Traeger’s convection airflow is that heat circulates evenly around the food. Cook your spatchcocked chicken skin-side up the entire time for the crispiest results.
Can I smoke a frozen chicken on the Traeger?
No — always thaw poultry completely before smoking. Cooking from frozen means the outside will be done long before the inside reaches a safe temperature, increasing food safety risks significantly.
How do I get crispy skin on Traeger chicken?
Three things: (1) dry brine uncovered in the fridge to remove surface moisture, (2) pat dry and oil before seasoning, and (3) finish at high heat (375°F+). If you want ultra-crispy skin, crank to 450°F for the final 5–8 minutes.
Final Thoughts
Once you have tasted Traeger smoked chicken — that deep mahogany skin, that faint wood-smoke aroma, that impossibly juicy meat — it is very hard to go back to cooking it any other way. The combination of the dry brine, the layered dry rub, the herb compound butter, and the two-stage cooking method produces a chicken that looks like it came out of a restaurant kitchen and tastes like it was made by someone who has been perfecting this recipe for years.
The truth is, with a Traeger and this guide, you absolutely have.
Tried this Traeger chicken recipe? Drop a star rating and a comment below — we would love to hear how it turned out! And if you snap a photo, tag us on Instagram. Nothing makes us happier than seeing your smoked chicken moments.